프론트엔드/GraphQL
[GraphQL] Apollo를 이용해 GraphQL API서버 만들기 - Query Type
잡캐헨리
2022. 10. 12. 00:42
앞서 Apollo-server, GraphQL , Nodemon 패키지 설치를 완료했다면, 이제 본격적으로 코드를 작성해보면 된다.
모듈 import
import { ApolloServer, gql } from "apollo-server";먼저 Server.js 파일을 생성해주고, ApolloServer와 GraphQL 모듈을 import 해준다
서버코드 작성, 실행
const server = new ApolloServer();

server.listen().then(({ url }) => {
  console.log(`Running on ${url}`);
});
이후 nodemon으로 server를 실행해보면 오류가 나게될 것이다. graphQL을 사용해 서버통신을 구현하기 위해서는 타입정보와, 요청받은 쿼리의 동작을 담당할 resolover 함수가 필요한데 이를 설정해 주지 않았기 때문이다
Type definition, resolvers 설정
const typeDefs = gql`
  type Query {
    allTweets: [Tweet!]!
    tweet(id: ID!): Tweet
    allUsers:[User!]!
  }
`
위와 같이 코드를 작성해 Type 를 정의해 주어야 하고, 주의할 점은 ` (백틱) 을 사용해서 작성해줘야한다
const resolvers = {
  Query: {
    allTweets() {
      return tweets;
    },
    tweet(root, { id }) {
      return tweets.find((tweet) => tweet.id === id);
    },
    allUsers(){
      return users
    }
  }
  }
위와 같이 Resolver를 설정해 주면되는데 resolver는 서버에서 요청을 받고 실제로 요청을 처리하는 부분이다
// 첫번째 인자로 type를 받고, 두번째 인자로 Resolover를 받는다
const server = new ApolloServer({ typeDefs, resolvers });

server.listen().then(({ url }) => {
  console.log(`Running on ${url}`);
});
이후 ApolloServer 에 정의한 typeDefs와 Resolvers를 인자로 넘겨주고, nodemon 으로 server.js를 실행해주면 서버가 정상적으로 준비된것이다.
Ready to serve
서버를 실행했다면 http://localhost:4000/ 링크로 이동해서 Apollo를 이용해 만든 GraphQL 서버를 확인해 볼 수 있다.

Query your server 버튼을 클릭해서 실제로 아폴로서버에 요청하고, 데이터를 받아올 수 있다.
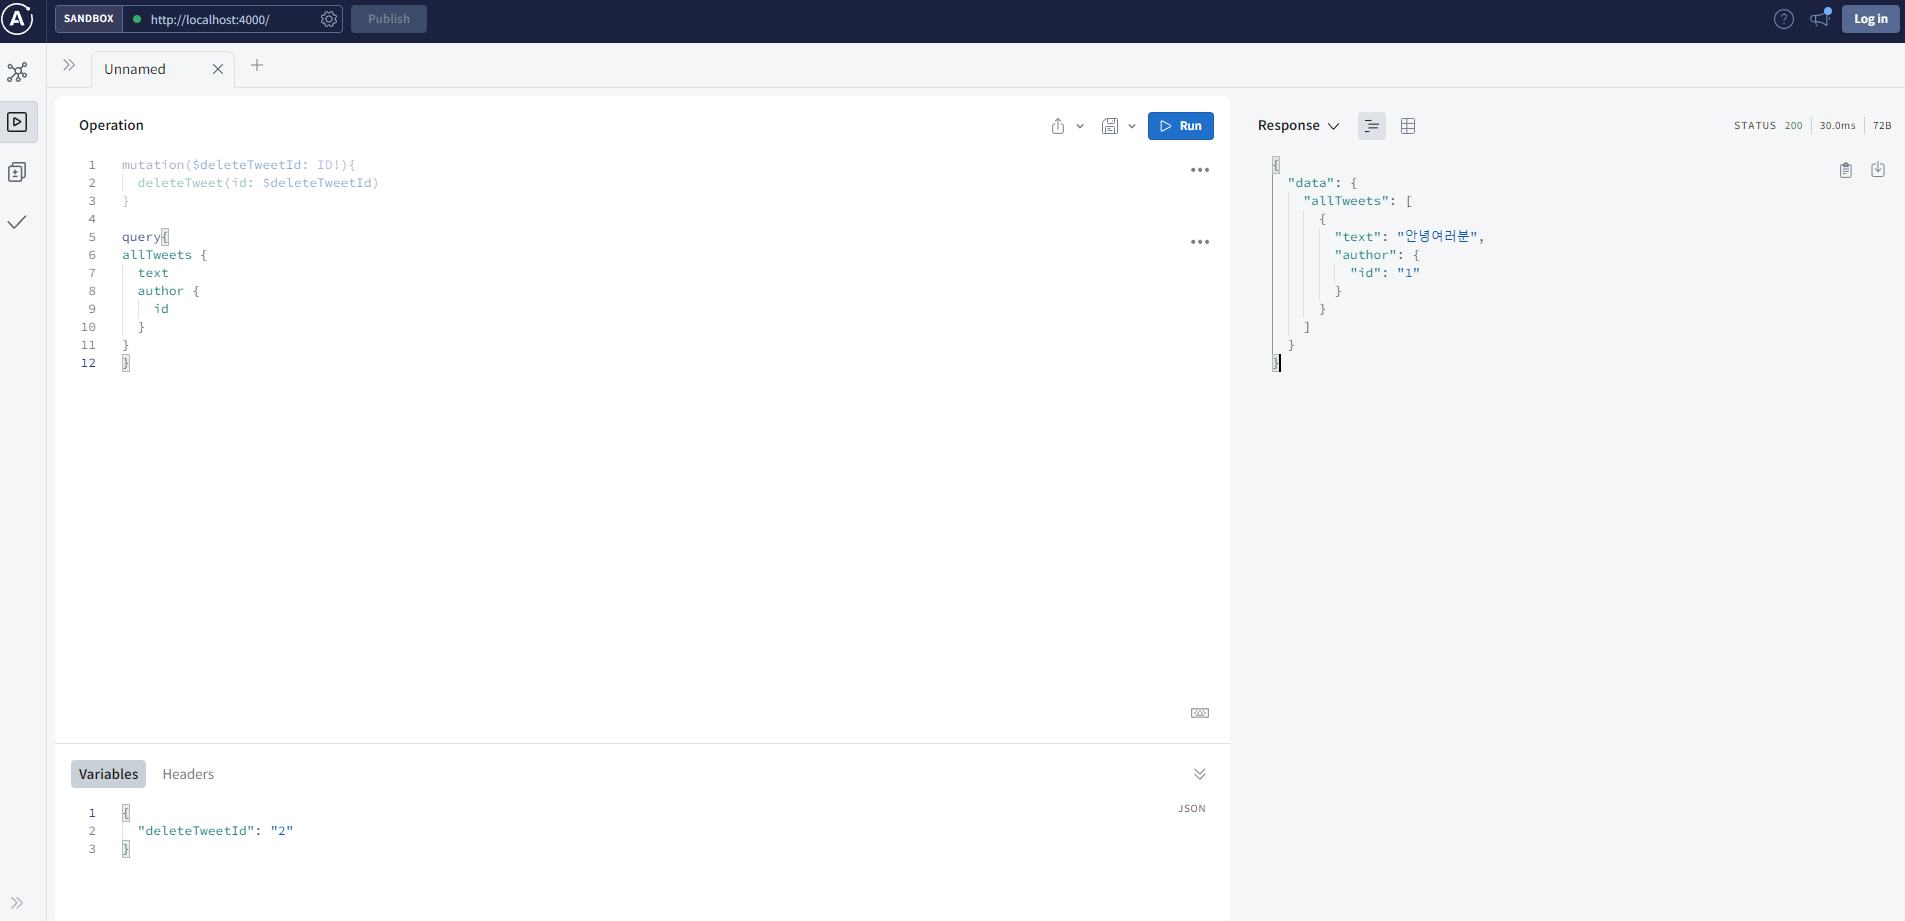
위 이미지는 resolvers 와 더미데이터로 이루어진 DB까지 다 설정해놓은 후 실행했을때의 이미지 이므로, 아직 reslover와 db를 연결해 놓지 않았다면 error 혹은 null이 응답으로 올 것이다.